
Transforming a piece of furniture can breathe new life into any space, making a once-dull item a stunning focal point. To achieve a professional finish when painting furniture, it is essential to properly prepare the surface, choose quality paint, and apply techniques that ensure even coverage. This process not only enhances the appearance but also extends the lifespan of the piece.
Painting furniture requires attention to detail and the right materials. Selecting the appropriate color and finish can elevate the design aesthetic. Mastering the preparation, including cleaning, sanding, and priming, sets the stage for success in a furniture makeover.
The final steps, such as applying multiple thin coats of paint and allowing proper drying time, are crucial for achieving that flawless look. Ignoring these details can lead to an unsatisfactory result. With the right approach, anyone can turn a simple furniture piece into a professional-grade masterpiece.
Preparing Furniture for Painting
Before beginning the painting process, proper preparation of the furniture is essential. This includes cleaning, repairing, and sanding the surface to ensure paint adheres effectively and the finish appears professional.
Cleaning and Repairing the Surface
Cleaning the furniture is the first step in preparation. It removes dirt, grease, and old finishes that can interfere with adhesion. A solution of warm soapy water or a mixture of vinegar and water works well for this.
Inspect furniture pieces for any damage. Cracks or holes should be filled with wood filler and sanded smooth once dry. It’s crucial to ensure that the surface is even, as imperfections can affect the final appearance. After repairs, a second round of cleaning may be necessary to eliminate any dust from the repairs.
Sanding Techniques
Sanding is a critical technique in preparing furniture for painting. Start with a medium grit sandpaper (around 120 to 150 grit) to remove old finishes if necessary. Techniques will vary depending on the type of surface. For flat areas, a sanding block or an orbital sander may be used.
Once the old finish is removed, a fine grit sandpaper (220 grit or higher) should be employed for light sanding. This helps create a smooth base for painting. A sanding sponge can be useful for curved or detailed areas. Sanding ensures that paint adheres properly and minimizes the visibility of imperfections on the surface.
Removing Dust and Debris
After sanding, removing dust and debris is essential to prevent an uneven finish. A vacuum can be used to eliminate larger particles, but a tack cloth is recommended for fine dust. This cloth effectively picks up tiny particles that may hinder adhesion.
Moistening the cloth slightly can enhance its effectiveness. It’s important to wipe down all surfaces, including edges and corners. This step ensures that the painted surface appears clean and ready for the application of paint for a professional finish.
Priming and Selecting Paint
Achieving a professional finish on furniture starts with proper priming and careful selection of paint. The right primer and paint type significantly influence the durability and appearance of the final product.
Choosing the Right Primer
Choosing the correct primer is essential for ensuring proper paint adhesion and long-lasting results. A primer creates a smooth base, especially on uneven or previously painted surfaces.
- Oil-Based vs. Latex Primer
- Oil-based primers provide excellent adhesion for slick surfaces but require longer drying times.
- Latex primers are easier to clean, dry quickly, and work well for most interior projects.
Consider the material of the furniture. For example, if painting wood, a latex primer often suffices, while metal surfaces typically benefit from an oil-based option.
Paint Types for Furniture
Selecting the right type of paint is crucial for achieving the desired look and durability. There are several options to consider:
- Latex Paint: Ideal for indoor furniture, it dries quickly and cleans up easily with soap and water.
- Oil-Based Paint: Provides a hard, durable finish, making it suitable for high-use items. It takes longer to dry and has a stronger odor.
- Chalk Paint: Popular for its matte finish and ease of application, it often requires sealing with a topcoat for durability. Brands like Sherwin-Williams offer a wide range of colors and finishes suitable for this type.
Each paint type offers specific benefits depending on the project requirements.
Selecting Color and Finish
Color selection plays a pivotal role in the furniture’s final appearance. When choosing a color:
- Consider the Room: Match or complement existing decor to create a cohesive look.
- Sample: Try paint samples on a small area to see how they interact with lighting.
Finish is equally important. Common options include:
- Matte: Provides a soft, understated look.
- Satin: Slight sheen adds depth without being overly reflective.
- Gloss: Reflective surfaces enhance color vibrancy and are easier to clean.
For a dramatic effect, a black finish can create a striking contrast and elevate the furniture’s appeal.
Achieving a Professional Paint Finish
To achieve a professional paint finish on furniture, paying attention to application techniques and tools is essential. Proper methods can enhance the final look, while taking measures to avoid common issues like brush marks can ensure a smooth result. Distressing can add character to the piece if desired.
Application Techniques
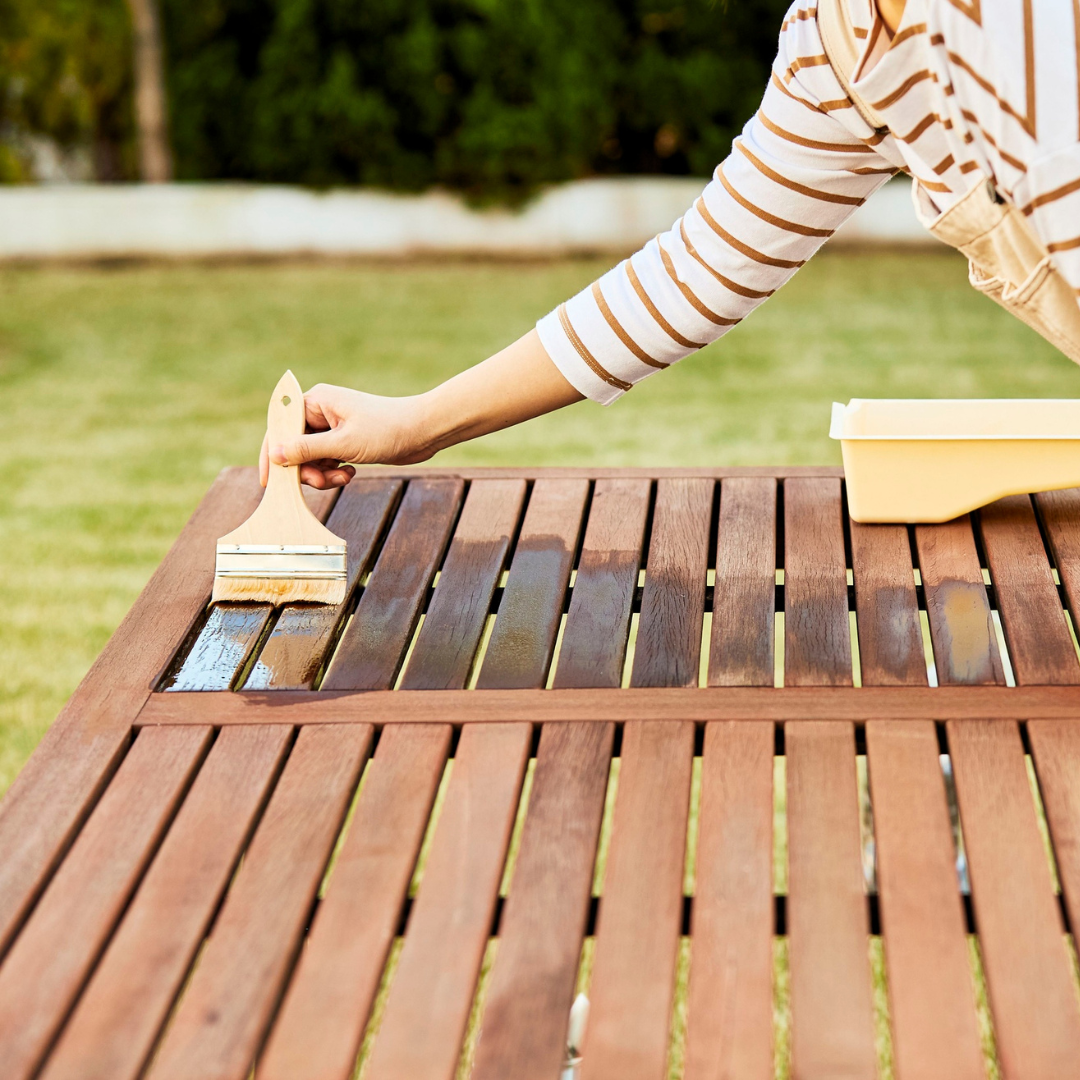
Effective application techniques significantly influence the outcome of a painted finish. Beginning with smooth, even strokes is crucial. It is important to apply paint in thin layers, as this minimizes drips and allows for faster drying.
Each coat should be allowed to dry completely before adding another, typically around 2-4 hours, depending on the paint type. Sanding lightly between coats creates a better bond and results in a smoother finish. Techniques such as cross-hatching—painting in alternating directions—can help achieve even coverage.
Using Brushes, Rollers, and Sprayers
Different tools can produce varying results, each suited for particular applications. A high-quality paintbrush is ideal for detailed work, such as corners and edges. Selecting a brush with synthetic bristles is often recommended for water-based paints.
Foam rollers excel at covering larger, flat surfaces quickly, providing a smooth paint layer. For a spray finish, using a paint sprayer can create a professional look. Proper distance and consistent motion are crucial when spraying to prevent uneven areas.
Avoiding Brush Marks
Brush marks can mar an otherwise smooth surface, so taking precautions is key. Using the right brush is essential—soft, high-quality brushes produce fewer marks. Wetting the brush slightly before painting can also make the application smoother.
Working with smaller sections allows for better control. After applying paint, light strokes can help level out the finish. If marks do appear, sanding lightly once the paint dries will help refine the surface. Always ensure ample drying time before making any adjustments.
Distressing for Character
Distressing furniture involves intentionally aging the painted finish, adding character and charm. Techniques such as sanding edges or using a damp cloth to remove paint in certain areas can create an authentic look.
It’s important to choose areas that would naturally wear, like corners or edges. Using a contrasting paint color underneath can provide an appealing contrast when distressing. A light touch is advised to maintain the integrity of the piece while achieving the desired effect.
Protecting and Maintaining Your Painted Furniture
Proper care and protection are essential for preserving the finish of painted furniture. By applying the right products and following care tips, individuals can extend the life of their furniture.
Applying Topcoats and Sealers
Applying a topcoat is crucial after painting furniture, particularly for pieces that will endure frequent use, like kitchen tables. A polyurethane or polycrylic topcoat adds a protective layer against scratches, moisture, and UV damage.
When choosing between these options, consider the intended use. Polyurethane offers superior durability for high-traffic areas, while polycrylic is suitable for projects requiring a crystal-clear finish.
The application process involves ensuring the paint is dry, lightly sanding the surface, and applying the topcoat with a brush or spray. Following the manufacturer’s instructions on drying times and application methods will yield the best results.
Selecting a Durable Finish
Choosing a durable finish can significantly impact the furniture’s longevity. It is essential to select finishes that are specifically designed for furniture use and that can withstand stains and scratches.
Some popular finishes include satin, semi-gloss, and gloss. A semi-gloss finish provides good durability while maintaining aesthetic appeal, making it a popular choice for kitchen tables.
Always consider the furniture’s function and environment. High-moisture areas may benefit from water-resistant finishes, while items exposed to sunlight require UV protection.
Care and Cleaning Tips
Maintaining painted furniture requires simple, regular care. For daily cleaning, a soft, dry cloth is often sufficient. Avoid abrasive scrubbing pads that may damage the paint.
Spills should be wiped up immediately to prevent staining. A mild soap solution can be used for more thorough cleaning, but should be applied sparingly to avoid water damage.
For long-term maintenance, reapply topcoats every few years, especially for high-use pieces like kitchen tables. Such preventive measures extend the furniture’s life and keep it looking new.